 By Caleb Morgan
Updated November 2026
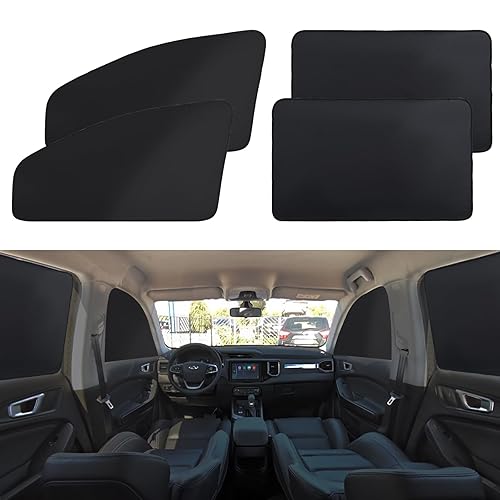
DIY window covers for car camping are one of the cheapest upgrades you can make to your vehicle before a trip. In this guide, you will cut custom covers that block sun, hide your gear from passersby and let you sleep in the dark. The whole project takes an afternoon and needs only basic materials.
Choose Your Material and Method
Most campers pick one of two approaches. Reflectix-style insulated bubble foil is light, blocks heat well and cuts to shape with a utility knife. Black or dark blackout fabric is softer, quieter when you close the car and folds down small. Many people use foil on the windshield and fabric on the side and rear windows.
Shopping for one? See our guide: 3 Best Car Window Nets for Camping (2026).
Foil works best for sun and heat, but it lets almost no light through, which can make a dim car feel closed in. Fabric gives you more flexibility and a cozier feel. If you camp in cold weather, insulated foil also helps hold warmth overnight.
Make Your Covers Step by Step
- Measure each window from the inside. Record the width and height at the top, middle and bottom, and use the largest number in each direction so the cover fits without gaps.
- Make a paper template first. Tape sheets of paper over the window, trim them to fit, and check the fit before cutting your real material.
- Transfer the template to your foil or fabric. Add about half an inch of extra margin on all sides so the cover sits snugly against the frame.
- Cut the material with a sharp utility knife on a flat surface. Use a straightedge for clean lines and replace the blade if it starts to drag.
- Attach a fastener to each cover. Options include small suction cups, magnetic strips glued along the edge, or hook-and-loop tape stuck to the frame.
- Test the fit in daylight. Hold each cover in place, check for gaps and trim as needed.
Make Them Easy to Install and Store
Label each cover with a marker on the back, such as “driver front” or “rear left,” so you can place them quickly in the dark. Keep them flat in a folder or slip them behind a seat when you travel. A mesh bag or a rolled bundle with a rubber band keeps them from getting crushed under gear.
For windows you need to crack open for airflow, cut a separate narrow panel that covers only the gap. This lets you ventilate without exposing the whole car. For more on that, see Car Camping Window Ventilation: A Step-by-Step Guide to Airflow.
Tips and Common Mistakes
- Do not measure only once. Recheck your numbers before cutting.
- Avoid covers that are too tight. Forcing them can warp the frame or pop suction cups off.
- Do not block your mirrors or driver’s visibility with a sun cover in place while driving.
- Skip reflective foil on dark tinted windows at night if you want to see out clearly.
- Test your fasteners on a warm day first, since adhesives can soften or loosen in heat.
Recommended gear
A sharp utility knife with extra blades makes clean cuts on foil and fabric alike. View on Amazon
Hook-and-loop tape lets you mount and remove covers without damaging your window trim. View on Amazon
A cutting mat protects your work surface and helps keep lines straight. View on Amazon
FAQ
Do DIY window covers damage car windows?
Properly sized covers held by suction cups or hook-and-loop tape rarely cause harm. Avoid strong adhesives directly on tinted film or rubber seals, and remove covers after each trip.
What is the best material for a DIY car window cover?
Insulated foil suits sun and heat, while blackout fabric suits darkness and quiet. Many campers combine both depending on the window and the weather.
Can I drive with window covers on?
Remove covers from the front windows and mirror areas before driving. Check your local rules, since some regions restrict coverings on certain windows.
Conclusion
Custom covers take only a few measurements, a template and a sharp knife to make. Once you have a set, you will get better sleep, more privacy and less heat inside your vehicle. Keep them labeled and stored neatly, and you will be ready for your next trip.
Related reading
- Window Coverings for Car Camping: A Step-by-Step Guide to Privacy and Shade
- Car Window Fan for Camping: A Step-by-Step Guide to Staying Cool
Ready to choose one?
About Caleb Morgan
Caleb Morgan is part of our editorial team and reviews and edits our camping know-how guides, checking product details against manufacturer specifications and owner feedback.